
When invoices are shared from Abtrac to your accounting system, each invoice line requires a General Ledger (GL) account code. GL Code Mapping allows you to automatically assign GL codes based on Job Type, Office, Category, or Disbursement.
For example, Surveying projects might be posted to a different income account than Engineering projects, or each office may use its own revenue account. Once mappings are configured, Abtrac automatically applies the appropriate code when invoices are shared.
What you can map
You can assign GL codes to the following Abtrac maintenance item types:
- Job Types – Different project types can use different revenue accounts.
- About Job Types
- Offices – Revenue can be separated by office.
- About Offices.
- Job Type + Office – Combine both rules when different offices use different accounts for the same work type.
- Disbursements – Recoverable expenses such as printing, searches, consent fees and courier charges. Unlike other mapping types, a disbursement can have both a revenue GL code (when invoiced to a client) and an expense GL code (when a supplier bill is imported into Abtrac).
- About Disbursements
- Categories – Categories used for invoice reporting and analysis.
Before you start
The GL codes you want to use must already be added to your accounting interface. You can add them from Accounting >> Interface Settings >> Settings >> Manage GL Account codes.
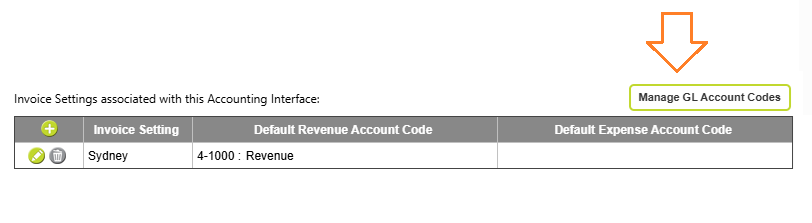
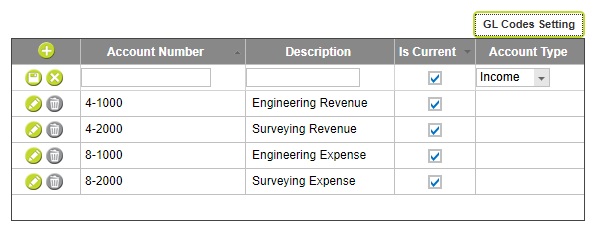
More details are in these articles:
How GL Code Mapping works
GL Code Mapping provides a way to override the default GL code assignment for specific project types, offices, categories, or disbursements. When Abtrac determines the GL code for an invoice line, it checks these mappings and applies the most appropriate code automatically.
For more information about the order in which GL codes are selected, see How GL account codes are applied to Abtrac invoices.
Using the GL Code Mapping page
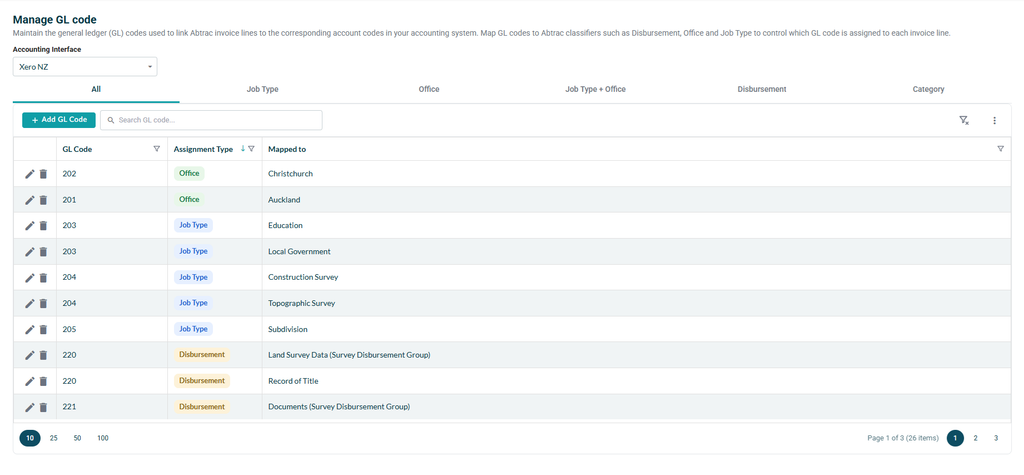
From Administration >> Maintenance >> GL Code Mapping, you can see and manage all of your mappings.
Select an Accounting Interface for Mapping
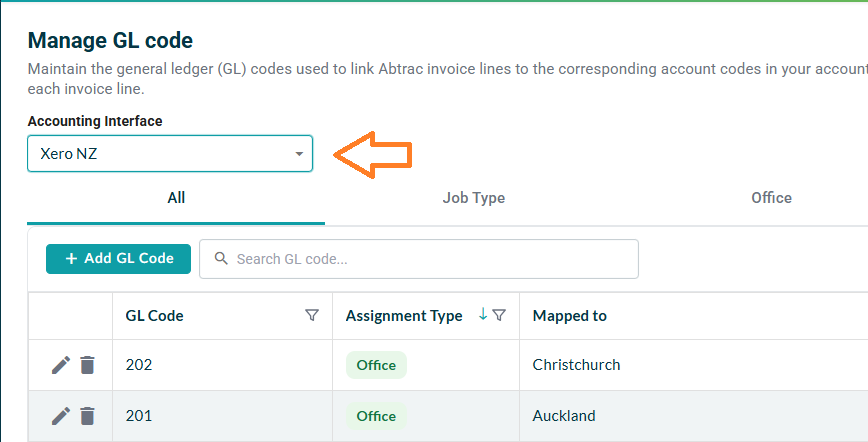
Each accounting interface, such as MYOB Australia or Xero, has its own set of mappings. The Accounting Interface drop down at the top of the page shows which one you’re looking at.
If you use more than one interface, choose another from the drop down. The page reloads with that interface’s mappings and goes back to the All tab.
View All GL Code Mappings
The GL Code Mapping page is organised into tabs that let you view one type of mapping at a time.
The columns in the list change to suit each tab, and the All tab shows every mapping for the selected accounts interface. The Assignment Type column shows a coloured label for each mapping type, and the Mapped to column shows what the code is mapped to, for example 202 → Office → Christchurch.
Searching and clearing filters
Type in the Search GL code box to find a GL code, job type, office, disbursement or category. The list filters as you type.

To go back to the full list, click Clear All Filters on the right. This clears your search and any column filters, but keeps you on the same tab.

Adding a GL code mapping
Click the ‘+ Add GL Code’ button at the top left of any tab. The ‘Add GL code assignment’ panel opens on the right of the page.
Work down the panel from top to bottom. Fields marked with a red * must be filled in.
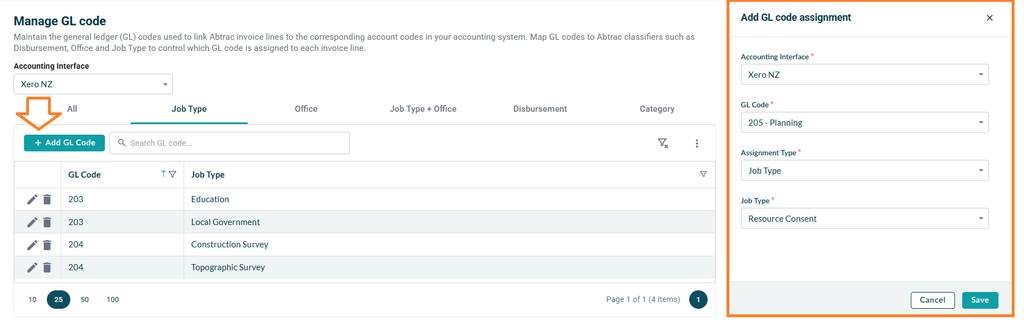
Each mapping can only exist once for a particular accounting interface. If a matching assignment already exists, edit the existing mapping instead of creating a new one.
A single GL code can be assigned to multiple Job Types, Offices, Categories, or Disbursements. Disbursements are unique because they can have both a revenue GL code (for invoicing clients) and an expense GL code (for imported supplier bills).
| Field | What to select |
| Accounting Interface * | The accounting system this mapping is for. It starts as the interface you’re viewing, so you usually don’t need to change it. If you change it, the GL Code list changes to that interface’s codes. |
| GL Code * | The account code to use. Only current GL codes for the chosen accounting interface are listed. You can type in the box to search. |
| Assignment Type * | What you’re mapping the code to: Job Type, Office, Job Type + Office, Disbursement or Category. The fields below change to match your choice. |
| Job Type * | Shown for Job Type and Job Type + Office. Choose the type of project. |
| Office * | Shown for Office and Job Type + Office. Choose the office. |
| Disbursement Group | Shown for Disbursement. This is optional. Choosing a group shortens the Disbursement list to that group only. Click the x to clear it and see every disbursement again. |
| Disbursement * | Shown for Disbursement. Choose the disbursement type. |
| Category * | Shown for Category. Choose the category. |
Mapping one GL code to many disbursements at once
If most of your disbursements use the same GL code, you can create multiple mappings in a single step.
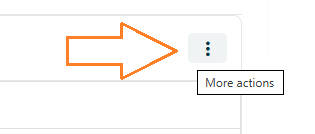
From the Table Menu > Click the More Actions symbol (⋮) > and choose Bulk add.
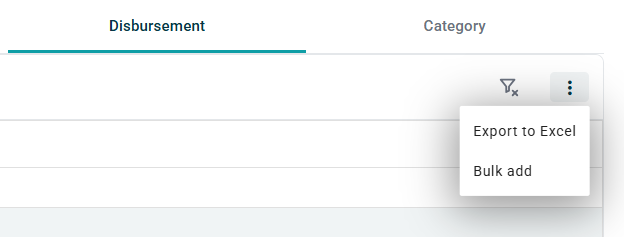
- Choose the Accounting Interface and the GL Code.
- Under Bulk Add Option, choose either:
- Apply to all disbursements, or
- Select disbursement group, then choose the group.
- Click Bulk add.
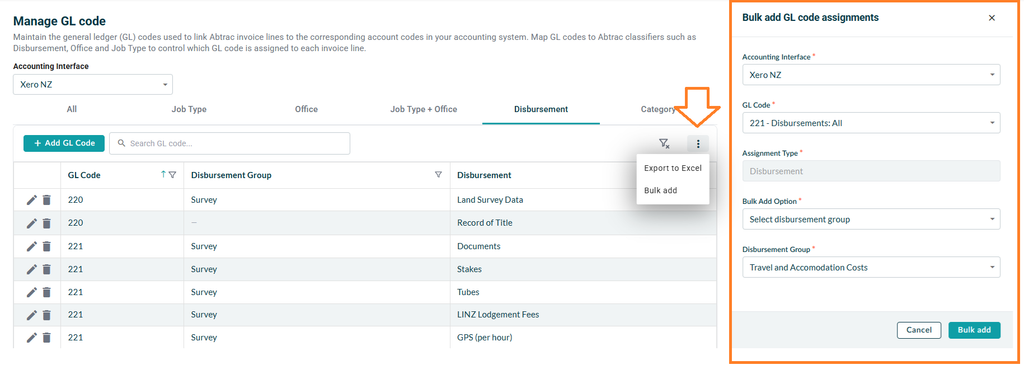
Existing mappings are not replaced. Only unmapped disbursements are assigned the selected GL code.

Editing or removing a mapping
Each mapping in the list has two buttons on the left of its row: a pencil to edit it and a bin to remove it.
To change your GL code mapping
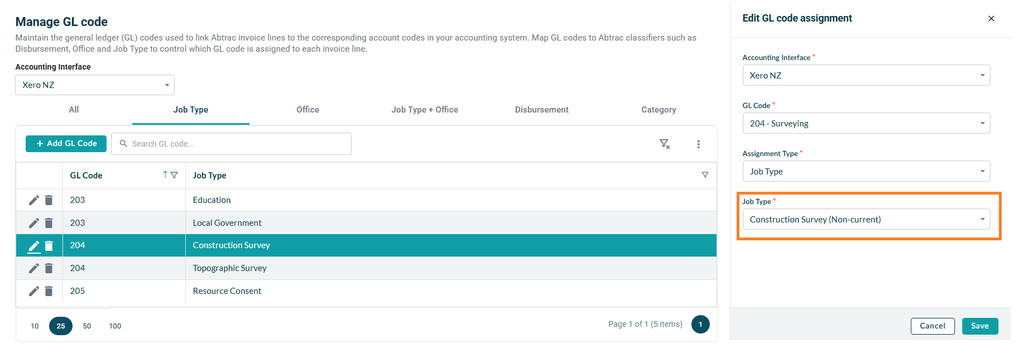
To change a mapping, click the pencil icon. The ‘Edit GL code assignment’ panel opens with the mapping’s current details already filled in. You can change any of the same fields as when adding, such as choosing a different GL Code or a different office. Click Save to keep your changes, or Cancel to leave the mapping as it was.
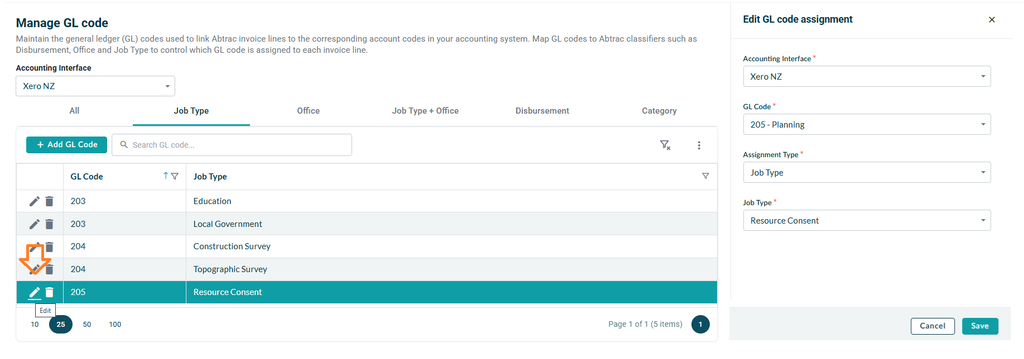
Non Current Mapping information
If a mapping references an Abtrac item that has been marked as Non-current, such as an Office, Job Type, Disbursement, or Category, the mapping remains in place and is shown as (Non-current).
Existing mappings continue to work, however you cannot create new mappings using items that have been marked as Non-current.
To delete your GL code mapping for a selected type
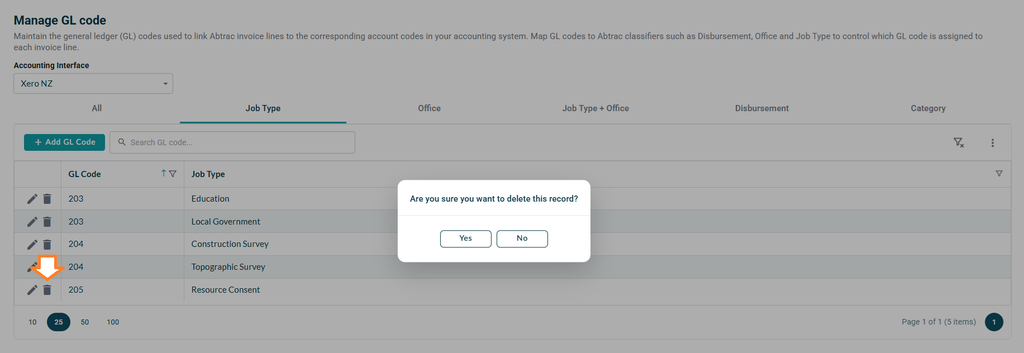
To remove a mapping, click the bin icon on its row, then click Yes to confirm.
Manage GL Codes: More Actions (⋮)
The More Actions button (⋮) at the top right of the page has two options:
Export to Excel
Export to excel downloads the list as a spreadsheet called GLCodes.xlsx. It includes what you can currently see, so choose a tab or search first if you only want some of your mappings.
Bulk add
Bulk Add maps one GL code to many disbursements at once. See Bulk map disbursements above for details.
Abtrac KB # 2293